
Signs of aluminium mast wear: A 5-minute check could save you time and money
by Mark Jardine 9 Apr 2020 11:00 UTC
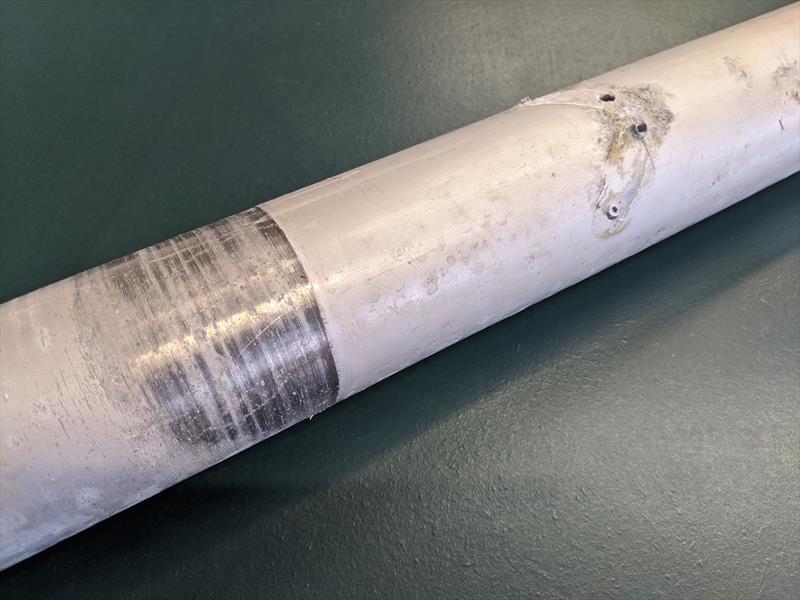
Signs of aluminium mast wear: Laser mast bottom-section with deck rubbing and kicker fitting corrosion © Mark Jardine
It's worth giving your aluminium mast a regular check to look for signs of wear which could lead to the mast breaking, causing extensive damage, not to mention ruining any event which you're taking part in. We spoke to Pete Jary of Zest Boatworks to find out what common problems are...
We started from the top, looking at the head sheave:
"Check the head sheave block isn't worn out, is rotating correctly and that the halyard isn't going to go down the side of the sheave. These are replaceable parts so can you just buy a new head sheave. On this mast you can see where the rope has made a flat spot in the block."
Next up is often the spinnaker halyard block, but this advice also applies to a jib halyard block:
"Check it rotates properly and that the bearings haven't gone in it. While you're looking at the mast, check the condition of the spinnaker halyard as well. Also look for signs of corrosion where the exit hole is cut in the mast where the sheave block fits, particularly around the screws and rivets. Also check everything is tightened, for example here I can unscrew one of the screws by hand."
With Laser spars check all of the fittings and inserts. Missing rivets and all signs of corrosion should be addressed.
The shroud terminals are the next point to inspect:
"The shrouds are the highest loaded point on the mast, followed by the forestay. Check for signs of corrosion on anything between stainless steel and aluminium - as you can see on this mast, there is a lot of cracking appearing around the hole the shroud goes in - this will only get worse and eventually the crack will go all the way around the mast and meet the other side which is also starting to crack. This is all due to the corrosion between the aluminium and stainless-steel fittings. The T-terminal needs taking out, the corrosion cleaning up and then a new anti-corrosive compound needs putting in there, such as Duralac or Tef-Gel and the fitting put back on. This particular mast is already starting to crack though and it's only going to get worse."
The spreader brackets are the next major point on the mast:
"Check around the fittings for any signs of corrosion between stainless and aluminium again. Where the rivet holes are fitted there's something happening under this spreader bracket. This mast is quite old and there are signs of corrosion on the anodising either side of the stainless spreader bracket. This one probably needs taking off to see what's going on underneath and then an anti-corrosive compound applied. This spreader bracket looks like it has been added at a later date as it's not quite the right shape, so it most likely doesn't have any anti-corrosive compound on it."
Spreaders themselves are often covered in tape to prevent spinnaker snags, but this can hide problems underneath:
"Too much tape can stop you, or rainwater, washing salt from your spreaders. Anywhere that has stainless and aluminium together needs to be kept salt free."
The gooseneck is another high load area on the mast:
"As with other points, check for corrosion between the stainless gooseneck fitting and the aluminium of the mast. This one looks ok, but we are starting to see white bubbling around the edges where the aluminium is beginning to corrode. The fitting needs taking off, cleaning up, anti-corrosive compound applied and then fitted back onto the mast."
Moving towards the foot of the mast, there are often turning blocks attached with eyelets:
"We have a block which we can see has been moved three or four times and has pulled out because of the corrosion underneath. These should be 5mm holes and they're now massive."
The mast step itself should also be thoroughly checked:
"The foot of the mast can fill with sand and mud and this one is connected to the mast using three stainless screws and you can see the corrosion coming through. I wonder if this has been washed ever in its life."
This is a five-minute inspection which could save your event and a lot of wasted time and money should the mast fail. Be sure to regularly check your spars for the signs of wear and corrosion above and make the necessary repairs and maintenance to keep everything in top working order.